Playing with water soluble graphite and Carbon
I have been experimenting lately with water soluble Graphite and Carbon. Wet Paint had a sample to play with behind the counter. I made the mistake of spending a few minutes with it. The possibilities bugged me and bugged me until I went back to purchase it.
At first I bought the carbon disk - Viarco water-soluble carbon disk. Mainly because of the extreme black that seemed easier to get than the graphite. Also, it cost around $10 and the Viarco artgraf was a little more than $20. However, it did come in a little tin.
My first experiments are below. I used water directly on the disk with a regular water color brush. I also used a plate to keep a mixture of water and carbon. Later I changed to a seashell. This first round was really just playing and also mixing with water color to see what happened.
I really loved using the carbon. It acts a lot like some of the watercolors that are heavier. Daniel Smith makes a water color made from pipestone that acts similar in that the pigment doesn't float around and decide what it wants to do but seems impatient to settle in. Not exactly the same, but kind of close.
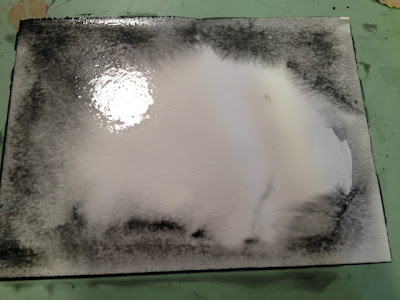
The other thing, is that when you are painting and everything is wet, it is really beautiful BLACK and Shiny. It reminded me of a comedian who described wanting his coffee Blackty Black Black. But two things happen when it dries. It is not as intensely black, and you get a ton of interesting effects you don't see until it dries. The images below are not my first attempt, but show this effect really well.
I had seashells on my desk and decided they were a great subject. Plus I owe a friend a drawing of these since she picked them up for me on her vacation.
First I got the watercolor paper very wet and with a brush painted the outline and let the carbon do whatever it wanted to.
I added another, very heavy wash around the outside seeing how dark I could get it. I have done this a couple of times in this image.
This is the "finished" product. Note that it isn't nearly so dark, but beautiful, and the hard edges are great. If I were to continue this I would start with a more carbon/less water brush and start to detail out the shell.
Another experiment, done while the sea shell rested, was to use the disk to draw on the paper and then apply water.

This image is after the carbon was on the paper and using a water loaded brush to move it around. I used the brush handle to score a horizon line to see what would happen.
This is the finished product. You can really see the line of the brush handle. Also note that even though the black is so shiny and wet, your brush strokes will show up when it dries. See the "first line of trees". I did this with the brush loaded with a little carbon to see if it would show up when dry. Fun stuff.
A few "finished" projects with the Carbon and progress shots
It took several layers reapplied after it dried to get this black.
THE GRAPHITE
I went back to Wet Paint for some other stuff. I was curious about the graphite. I thought maybe the blacks wouldn't be as black, but the greys were probably softer and subtle. I lamented that I didn't want to spend $20 and was promptly shown the exact same stuff in a drawing stick for $3-4 dollars. Perfect, because I think it would be fun to draw with as well and small enough to put in my pack.
The graphite acts very much the same and I am still getting used to it. My first attempt was my hat. You can see by the image below the blacks aren't as black but the greys are much softer.

My next step with the hat is to add a splash of watercolor. I understand the graphite (and carbon) are not water proof once they dry so I am curious to see the result. I will post the process once it happens!
I hope this was helpful. I love this stuff.
Keep drawing,
James Nutt, AIA


I love how you can create such beautiful, textured effects with these materials.
ReplyDelete